Wireless
Access Point
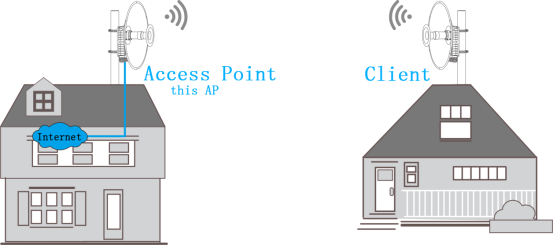
AP is mainly used to connect wired network and wireless devices (such as mobile phones, laptops, etc.) to enable wireless terminals to access wired network.
The usage scenarios are as follows:
Setting up the wireless configuration of the bridge.
Click the first-level directory "Wireless" to enter the configuration page.
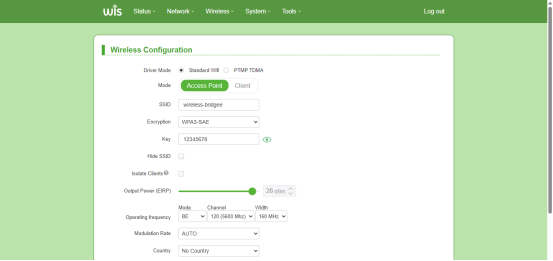

Setup Steps:
- Mode:Select the bridge working mode, the default is "Access Point". Select "Access Point" for AP mode.
- SSID:Modify the wireless signal name of the bridge, eg. Wireless-bridge.
- Encryption:Select the encryption method. Recommend to select "WPA3-SAE".
- Key:Wireless WIFI password, the default is: "12345678".
- Channel:Pull down menu and select wireless working channel.
- Click"Save & Apply",Complete the configuration.
Parameter Description:
| Parameter | Description |
|---|---|
| Driver Mode | Radio operating mode, supports standard Wi-Fi, PTMP TDMA. |
| PTMP TDMA | When a device (such as a mobile phone or computer) searches for WIFI, the displayed network name is called SSID. Users can connect to the corresponding wireless network by selecting the correct SSID and entering the password (if encryption is enabled). |
| Encryption | Wireless encryption method. Support "WPA3-SAE, WPA3-SAE/WPA2-PSK, WPA2-PSK". |
| Key | Wireless Wi-Fi password. Default is 12345678. |
| Hide ESSID | Tick the button to hide the wireless signal name. The default setting is: Untick. |
| Isolate Client | Wireless clients connected to the same AP cannot discover or communicate with each other; they can only communicate with the wired network of the access point. |
| Output Power | The power value used by wireless communication devices when transmitting signals directly affects the coverage range, penetration power and possible interference level of the wireless signal. The range of values: 1 - 27 dBm |
| Mode | Select the 802.11 working mode. By default, the bridge is set to the BE mode. It supports modes such as 11N, 11AC, 11AX, and 11BE. |
| Channel | In wireless communication, the "virtual channels" for signal transmission are similar to lanes on a highway. Different frequency channels are independent of each other, and devices avoid interference by using specific channels. |
| Channel Width | Also named channel bandwidth. Refers to the frequency range occupied by the signal in wireless communication (unit: MHz). It directly affects the transmission rate, anti-interference capability and spectrum utilization rate of the network. The default frequency is 160 MHz. It supports 20 MHz, 40 MHz, 80 MHz and 160 MHz. |
| Max Rate | MCS is the core mechanism for achieving a balance between "reliability" and "efficiency" in wireless communication. By dynamically adjusting modulation and coding methods, it enables the network to efficiently transmit data under different channel conditions. The default setting is: auto. It supports the selection of: auto, MCS0 to MCS13. |
| Country Code | Select the current country to adapt to the local wireless communication standards and laws/regulations. |
| Antenna Gain | Antenna gain is an important indicator for measuring the ability of an antenna to concentrate the input power and radiate it in a specific direction. It directly affects the coverage range, transmission distance and anti-interference capability of the wireless signal. By measuring the actual gain of the antenna when it is externally connected to the equipment, it helps to improve the performance of the equipment. |
Client
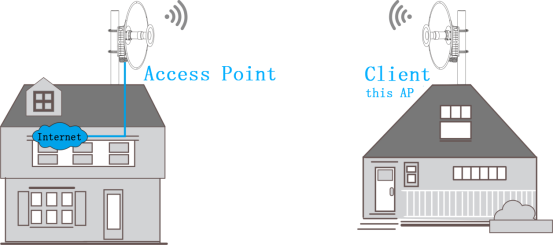
Switch the wireless network mode to "Client". Generally used in conjunction with the "Access Point" mode.
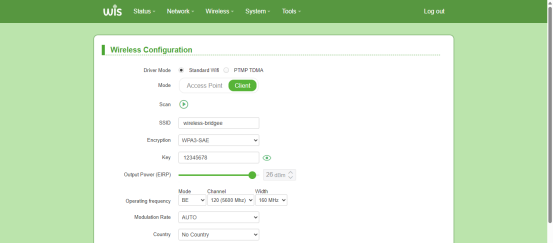
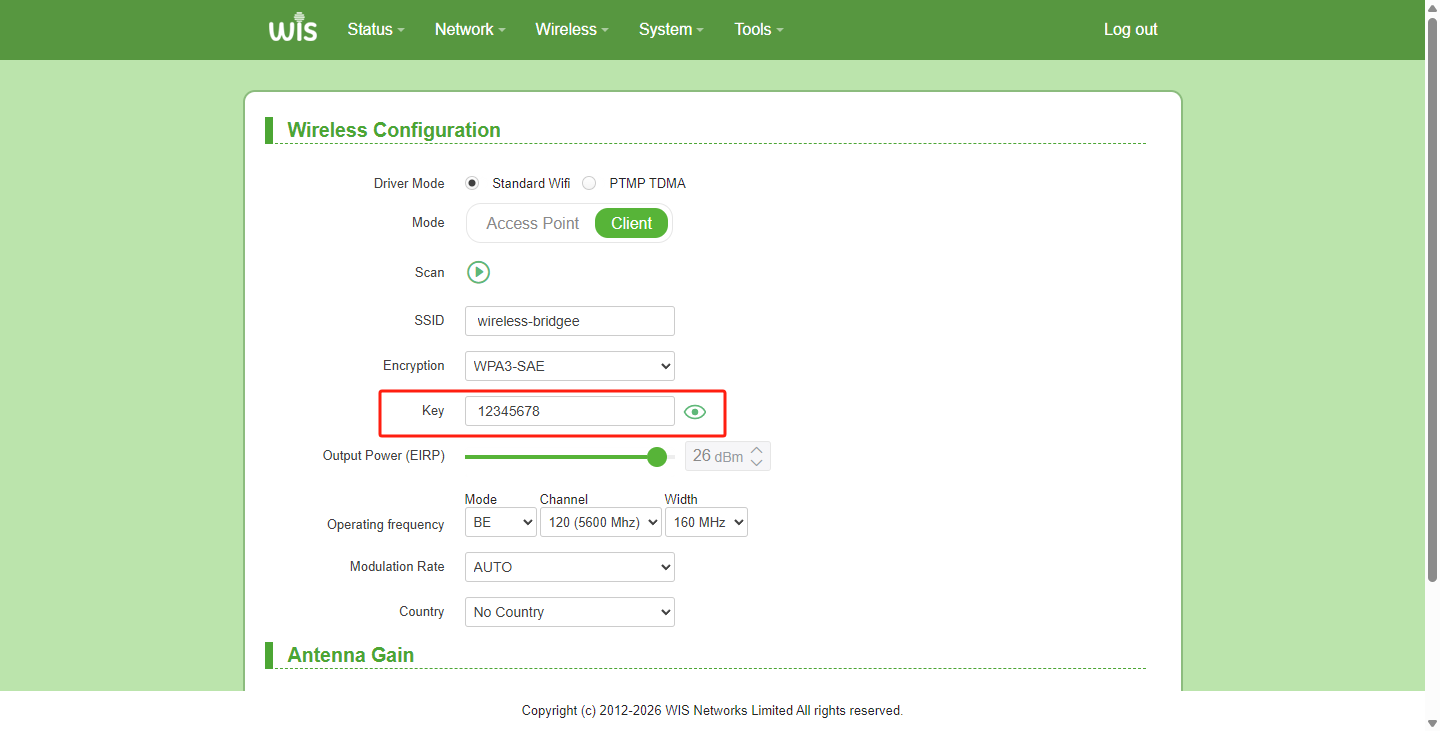
Click"Wireless", enter this page, Change "Mode" to "Client". The usage scenario is as follows:
Client side setup steps:
- Mode:Choose“Client”;
- SSID:Specify the name of the wireless signal,eg.wireless-bridgee;
- Encryption:Choose the encryption method. It is recommended to select "WPA3-SAE";
- Key:Wireless WIFI password, eg.12345678;
- Width:Select wireless bandwidth,the default frequency is 160 MHz. It supports 20 MHz, 40 MHz, 80 MHz, 160 MHz, and 320 MHz;
- Click“Save & Apply”,Complete configuration.
Note: The above configurations in the client mode must be consistent with those of the upper-level AP in order to successfully connect to the AP.
SCAN Usage steps:
Using the "SCAN" function, add the target AP.
execution step:
- 1.Click“Scan”.
- 2.Select the target AP through "SSID" and "BSSID".
- 3.Confirm the target AP. Click“Join Network”

Parameter Description:
| Parameter | Description |
|---|---|
| Signal | The client detects the wireless signal strength of the AP by scanning. |
| SSID | The wireless signal name of the AP in the wireless network. |
| Channel | Wireless channel used by the uplink AP. |
| Mode | The wireless mode of the uplink AP. |
| BSSID | The wireless physical address of the uplink AP. |
| Encryption | The wireless encryption method of the uplink AP. |
- 4.After the page is redirected, enter the WIFI password.
- 5.Enter the AP password.
- 6.Click“Save & Apply”. Complete configuration.
- 7.Wait for a few seconds, and the client device will automatically connect to the uplink AP.
MAC ACL
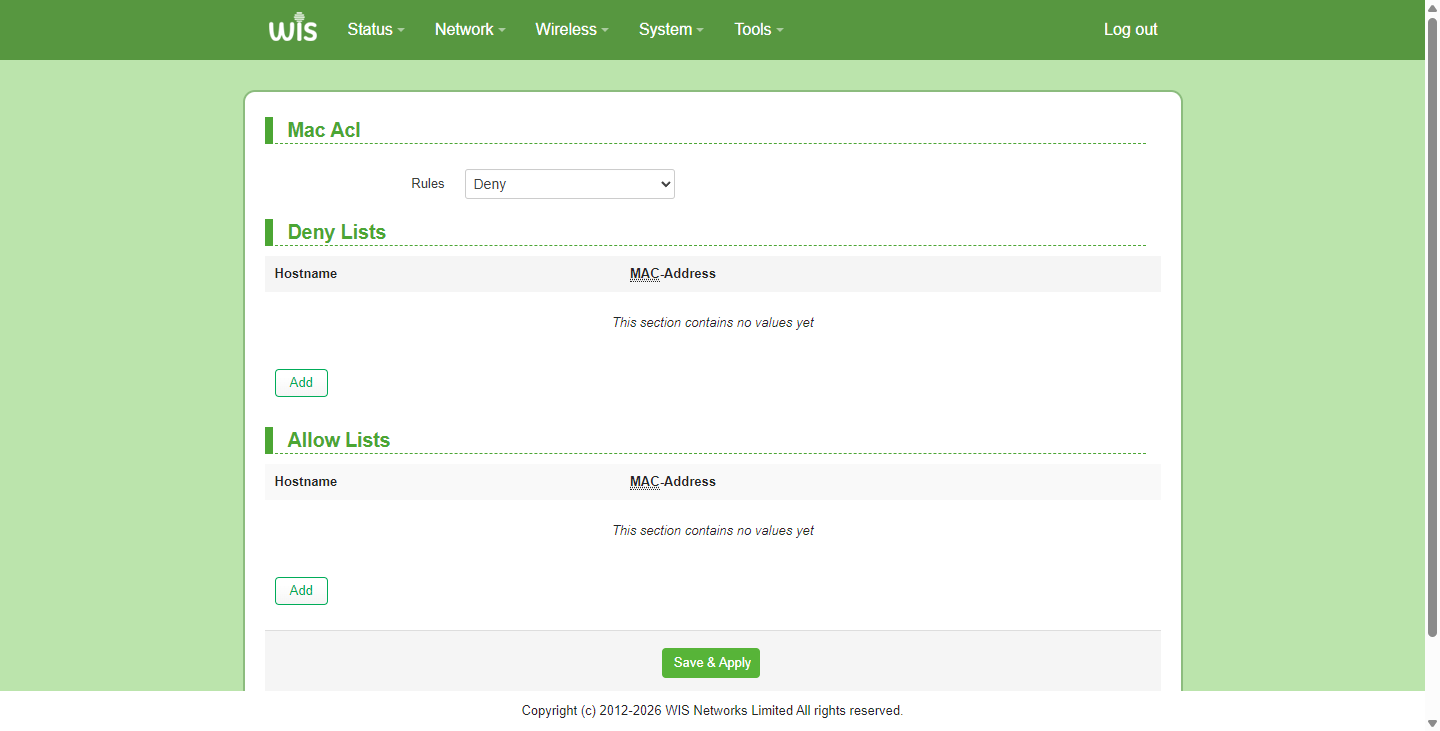
MAC Acl is a type of cybersecurity measure that enhances network access control by restricting the MAC addresses of devices that are allowed to connect to the network. The use of smart phones, laptops, computers and tablets is increasing gradually. Each device has its own corresponding MAC address. The access to the Internet of local network clients can be controlled through the MAC address filtering function. MAC address filtering has two access control modes: "Deny" and "Allow".
MAC rules
Select the MAC address filtering rule. It supports allowing MAC addresses to pass through or denying access to MAC addresses. The settings can be specified through the drop-down menu.
Deny Lists:
Add the client's MAC address to the list and prohibit the user from accessing the Internet.
Click“Add”, Create MAC address filtering rules.
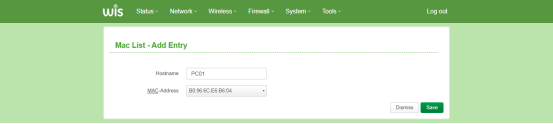
Create MAC address filtering rules:
1.Rule: Specify filtering rules. Default: Deny.
2.Click“Add”. The system pops up the creation interface.
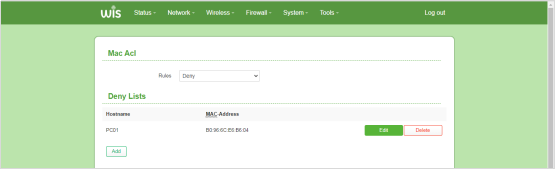
3.Host Name: Custom host label for easy identification of devices bound to this MAC address, such as PC01.
4.MAC address:Click on the drop-down menu and select the MAC address that needs to be restricted. You can also customize the MAC address, e.g., B0:96:6C:E6:B6:04.
5.Click“Save”, Save configuration.
6.Click“Save & Apply”, complete configuration.
Added successfully. As shown in the following picture.
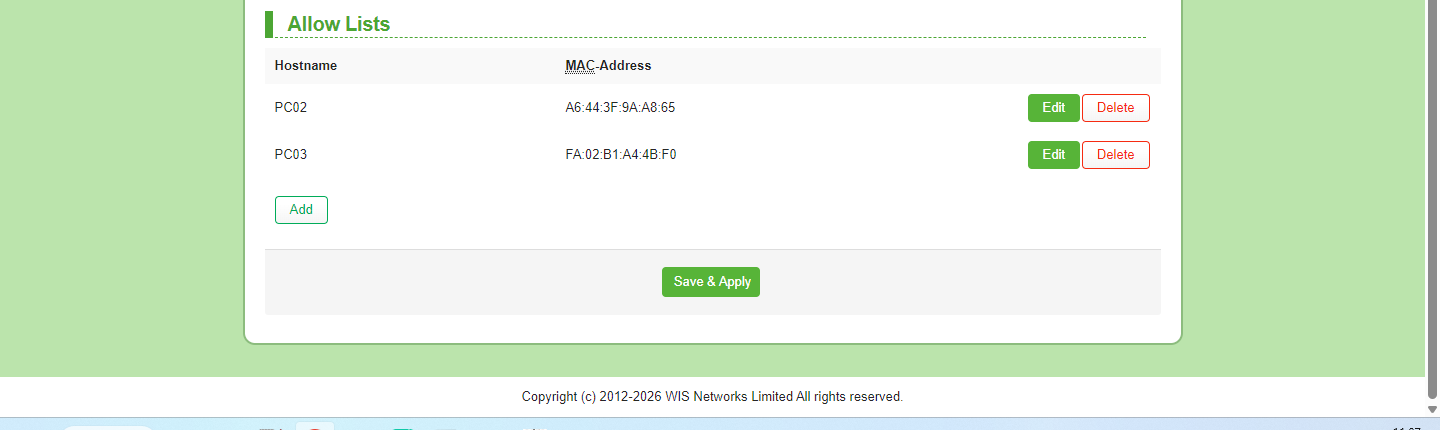
Allow Lists:
The MAC Acl is set to "Allow", which means that only the MACs listed in the "Allow Internet Access" table are permitted to access the Internet.