
Search...
Menu
Bridge Quick Pairing
Note: Bridge quick pairing enables wireless connection between two bridges via AP mode and Client mode.
- Power on the first device. The default bridge management IP address is 192.168.1.2, and the administrator password is admin.

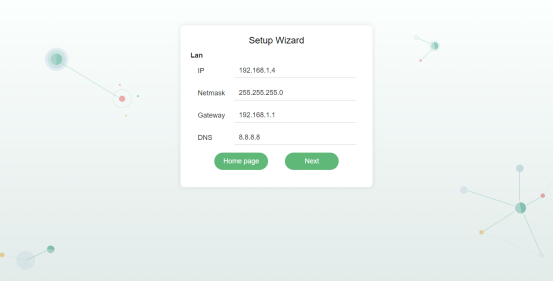
- Enter the setup wizard. It is recommended to change the IP address to avoid conflicts with other devices. Here, change it to 192.168.1.4 and click "Next".
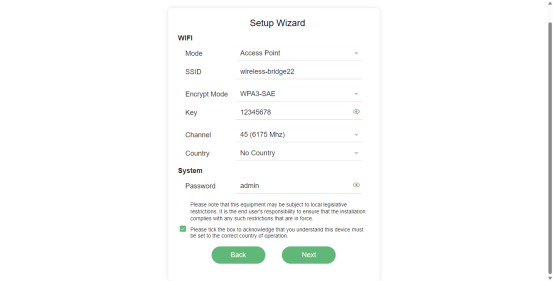
- Configure Wi Fi information. Set the Mode to Access Point (AP). Change the SSID to "Wireless-bridge22". Modify the wireless encryption method, wireless password, channel, and country code as needed. After filling in all details, click "Next" to proceed.
Note: For wireless configuration, the AP bridge and the Client bridge must have the same SSID, Encryption Mode, and Key information in order to connect successfully.
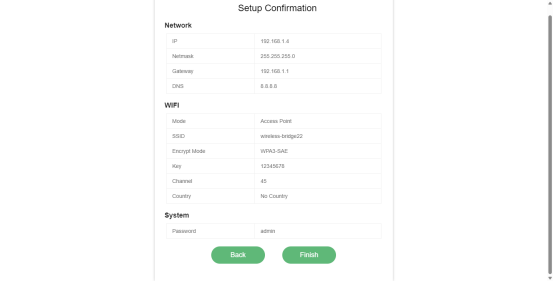
- Confirm the configuration settings and click "Finish".
At this point, the AP bridge has been fully configured.
- Power on the other bridge device. Its default management IP address is 192.168.1.2, and the administrator password is admin.
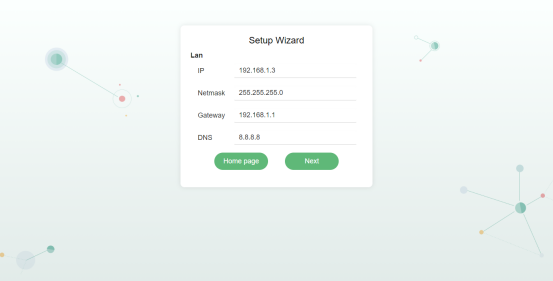
- Log in and enter the setup wizard. Change the IP address to 192.168.1.3.
- Configure Wi Fi information. Since the first bridge is already in AP mode, set this one to Client mode. The SSID, wireless encryption method, wireless password, and other settings must be the same as those on the AP device.
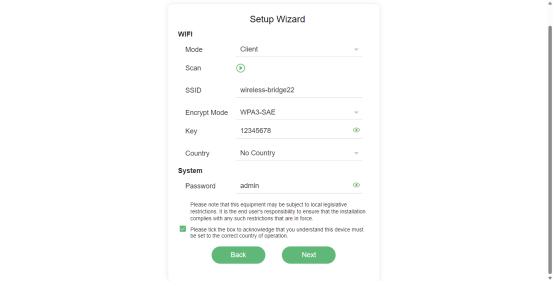
- Confirm the configuration and click "Finish".
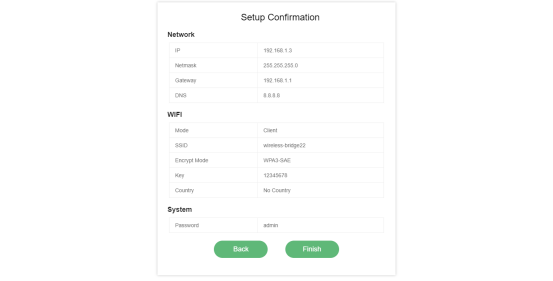
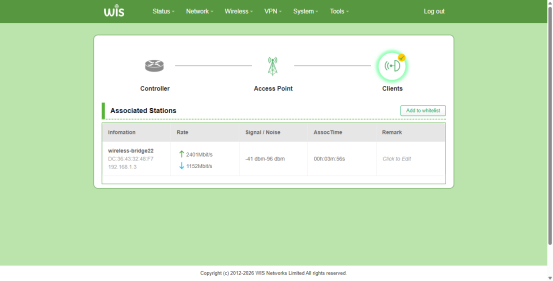
- Now, with only the Client bridge connected to the laptop, go to the bridge's status home page and check the wireless connection status. If the number of Clients shows 1, it means this bridge has successfully connected to the AP bridge.
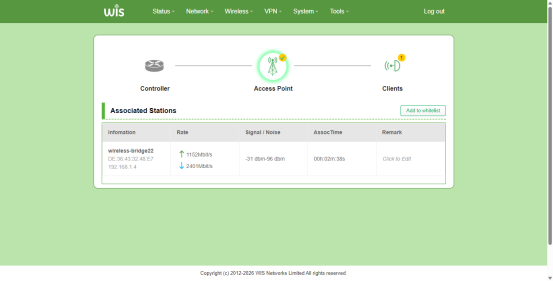
- Once the wireless connection is successful, you can also access the AP device directly via a web browser using the wireless connection.
Previous
How to setup vlan
Next
How to increase the LOG cache
Last modified: 2026-09-09